Recycled Halloween Craft: Marbled Pumpkins
Affiliate links may be used in this post. As an Amazon Associate I earn from qualifying purchases. Read the full disclosure policy here
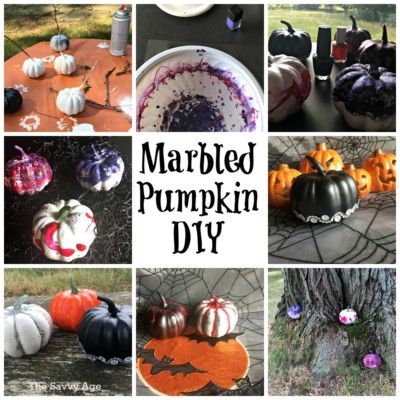
This is by far a very favorite recycled Halloween pumpkin craft! Make these artsy marbled pumpkins with old nail polish and you will be amazed at the results!
Adults and children will love this upcycled Halloween pumpkin craft. Marbled pumpkins are an easy Halloween DIY decoration and a great way to use those leftover, half empty and probably clumpy old bottles of nail polish.
A Halloween craft for young kids and kindergartners. And a Halloween craft for 2-3 year old toddlers who can help choose the colors and add the nail polish (with adult supervision of course!) Let your creativity wander for this foolproof craft for your Halloween party or to add to your fall decor.

Boo! How To Create Marbled Pumpkins With Nail Polish
Materials
Favorite Nail Polish
Water
Medium Bowl
Stick on jewels (optional)
Directions
- Decide upon the base color of the small craft pumpkin.
- TIP! Use a stick or plastic fork to spear the bottom of the pumpkin so you can easily spray paint the entire pumpkin.
- Rest the spray painted pumpkin on a disposable cup or in an egg carton to dry.
 4. Spray the pumpkin and let dry.
5. TIP! The pumpkin stems are removable, if you would like the stem to be a natural color, remove the stem before spray painting.
Begin Painting The Marbled Pumpkin With Nail Polish
![]() These are my favorite small craft pumpkins to use measuring 3.15 inches. The small pumpkins can be used for crafts or your Halloween or Fall decor.
These are my favorite small craft pumpkins to use measuring 3.15 inches. The small pumpkins can be used for crafts or your Halloween or Fall decor.
- Fill the bowl with water and let the fun begin.
- Add as many or as few colors of nail polish as desired.
- This was the perfect time to clean out the nail polish collection and use the older nail polish well past its’ prime.
- Pour nail polish into the bowl.
- Repeat with each color of nail polish.
- Swirl the bowl by either moving the bowl gently in a circle or stirring the mixture.
- The nail polish colors will move around and create a swirl effect.

- Use a test pumpkin (because of course there is always one pumpkin that didn’t come out quite up to par when spray painting.)
- Dip top half of the pumpkin quickly into the bowl and twirl.
- You can use the stick or fork that was used for spray painting as the handle.
- Let dry.
- The test pumpkin will give you a good idea of how the nail polish combines in the water and how that translates on to the pumpkin.
- Now the real fun begins as you can start manipulating the colors of the nail polish to make swirls or patterns.
- Different colors of nail polish and different colors of nail polish by different manufacturers will act slightly different when in water.
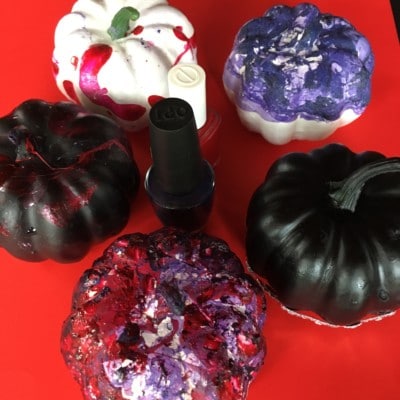
- After you have one or two pumpkins made, adults can make the marbled pumpkins with as much abandon or careful placement of the nail polish as desired.
- I loved seeing the abstract designs the nail polish made.
- You can dip the pumpkins as many times as you wish (will probably need to add nail polish between dippings.)
Pastel Marbled Pumpkins

Jewel & Glitter Pumpkins

While I was marbling the pumpkins with nail polish, I found a bottle of glitter in the craft stash and decided to glitter one pumpkin.
Learn how here to make a glitter pumpkin!
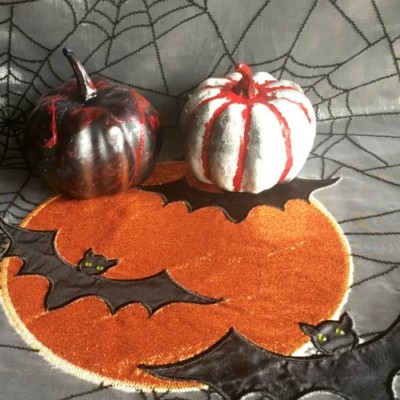
Distressed Marbled Pumpkins
Halloween Art Activity For Young Kids
This is an interactive Halloween craft for toddlers, preschoolers or kindergarten. Love that no pumpkin comes out the same and there is no wrong or right pattern.
They can choose the nail polish colors, pour the nail polish into the water and help mix the pattern of the nail polish. Your young helpers will be amazed at what colorful and easy marbled pumpkins can be created.
More Halloween Crafts
Upcycled Ceiling Fan Halloween Craft – Door Hangers
Walnut Shell Spider and Pumpkin
Nine Halloween Crafts For Kids