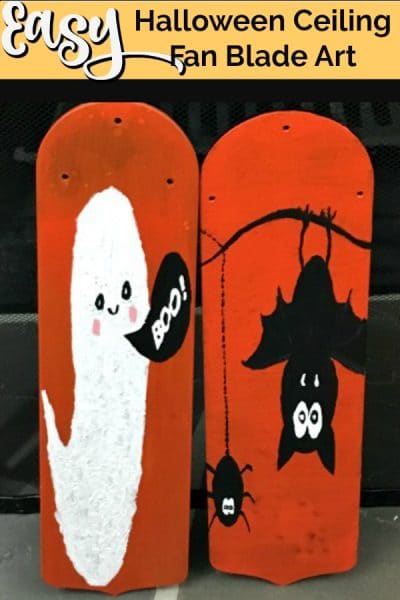
Boo! Recycle a ceiling fan into Halloween Ceiling Fan Art. So easy to repurpose ceiling fan blades and update into holiday wall hangings. If you finally had a chance to remove the ceiling fan (you know, the ceiling fan that came with the house and is very not today in style) then enjoy this recycled craft for Halloween or any holiday!
This spring it was time to pay attention to the old ceiling fans in the house. A few were shake, rattling and rolling and it was way overdue to change out these functional, but well worn and aged ceiling fans with a modern version. The switchout was easy and the leftovers! were parts of multiple ceiling fans.
These fan blades were perfect to repurpose into decorative wall and door hangings for the upcoming holidays. Let the recycling begin! Actually each part of this Halloween recycled craft was completed with using materials already on hand. Old paint, old brushes and old paint rollers found a new home for this Halloween door hanging.
How To Make Halloween Ceiling Fan Blade Art
Materials
Old Ceiling Fan Blade
Paint: Latex, acrylic or Gesso
Paint brush or roller
Parchment paper
Scrap ribbon or invisible thread for hanger
Sealer (optional), recommended if fan blade is exposed to outdoor elements
Directions
- Remove the hardware on the fan blade.
- Dust the fan blade.
- Clean with soap and water. Dry.
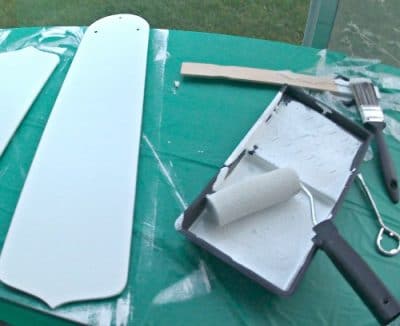
- Prep the fan blade by painting the base color on each side. I repurpose old paint that is latex, acrylic paint or Gesso to paint both sides of the fan blade.
- Let the paint dry overnight. Yes, the paint will dry quickly, but to ensure a solid base color I let the fan blade dry overnight.
- Be careful NOT to fill in the holes at top of the fan blade with paint as the holes will be used later to attach the hanger.
- If paint does adhere to the hole, use a toothpick to clean out the holes after painting.
- Choose the theme of the Halloween fan blade by looking for inspiration on the internet. Copy a few of your favorite images to free hand draw or trace.
- For the Halloween Fan Blades I drew free hand as the images were not too complicated (and I can’t draw, trust me!). But for those wanting a more precise image then tracing paper can be used. See instructions in the next step.
- This is optional, but I have found this extra step useful for those of us who are not comfortable drawing free hand. Measure the fan blade, this blade is 21 inches by 5.25 inches for an idea of the size of the images which can be used to fit inside the blade. I traced the fan blade on a piece of parchment paper or newspaper to make a sizing template. For this Easter fan blade I used two pieces of copy paper to make the bunny template.
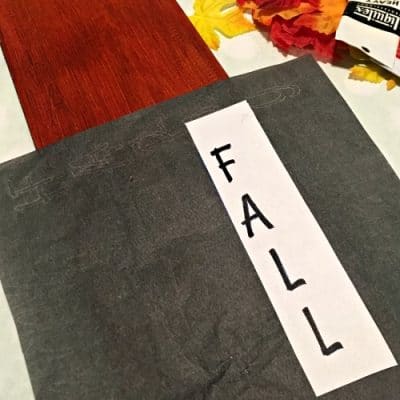
- Sketch out your theme on the fan blade in pencil. If you prefer the drawing can be drawn on the fan blade with graphite paper; however due to the length of the fan blade the drawing will need to be on two separate 8 1/2 by 11 inches sheet of standard copy paper.
- If using the trace on method, the images need to be sized prior to tracing on the fan blade.
- Fill in your drawing with paint.
- Let dry overnight.
- If hanging the Halloween Fan Blade outside or if the fan blade is exposed to the outdoor elements then sealer is recommended. Spray the fan blade with sealer and let dry.
- A hanger can be made by using scrap ribbon, string, twine or invisible thread. Thread the hanger through the three holes at the top of the fan blade to create a hanger.
- The length is determined by the location of where the fan blade will hang. Position the fan blade on the door or wall where the fan blade will hang to judge how long the hanger should be. After the length is determined tie the two ends of the string together to form a circle.
- If you like the invisible hanger, I highly recommend invisible thread. You will be amazed how handy invisible thread is for so many craft projects now and in the future.
- That’s it!
Halloween Recycled Craft For Kids
Making recycled Halloween crafts for kids is so fun and purposeful. Love to show how old household items can be transformed while upcycling household items at the same time. Making Halloween fan blades is so very easy and a fun way to involve the kiddos into repurposing parts of the house into Halloween Fan Blade Art.
The littles can participate and no need to trace an image or have perfect lines. Let them have fun just painting away and see their faces when the fan blade is hung on the door for Halloween! Another fun recycled craft for Halloween is making Halloween pumpkins from plastic milk containers.
Another very easy recycled craft that uses milk containers, paper and tape. Any packing paper can be used and with stay at home activities at a premium and the recycling centers taxed this is an economical and upcycled craft for Fall.
More Ceiling Fan Blade Craft Ideas
Let It Snow Fan Blade Art
Happy Holidays Fan Blade Art
Family Tree Fan Blade Art
Easter Bunny Fan Blade Art
Halloween Ghost Fan Blade Art
Halloween Ceiling Fan Blade Art
Ingredients
- Old Ceiling Fan Blade
- Paint: Latex acrylic or Gesso
- Paint brush or roller
- Foam brush
- Parchment paper
- Scrap ribbon or invisible thread for hanger
- Sealer optional, recommended if fan blade is exposed to outdoor elements
Instructions
- Remove the hardware on the fan blade.
- Dust the fan blade.
- Clean with soap and water. Dry.
- Prep the fan blade by painting the base color on each side. I repurpose old paint that is latex, acrylic paint or Gesso to paint both sides of the fan blade.
- Let the paint dry overnight. Yes, the paint will dry quickly, but to ensure a solid base color I let the fan blade dry overnight.
- Be careful NOT to fill in the holes at top of the fan blade with paint as the holes will be used later to attach the hanger.
- If paint does adhere to the hole, use a toothpick to clean out the holes after painting.
- Choose the theme of the Halloween fan blade by looking for inspiration on the internet. Copy a few of your favorite images to free hand draw or trace.
- For the Halloween Fan Blades I drew free hand as the images were not too complicated (and I can't draw, trust me!). But for those wanting a more precise image then tracing paper can be used. See instructions in the next step.
- This is optional, but I have found this extra step useful for those of us who are not comfortable drawing free hand. Measure the fan blade, this blade is 21 inches by 5.25 inches for an idea of the size of the images which can be used to fit inside the blade. I traced the fan blade on a piece of parchment paper or newspaper to make a sizing template.
- Sketch out your theme on the fan blade in pencil. If you prefer the drawing can be drawn on the fan blade with graphite paper; however due to the length of the fan blade the drawing will need to be on two separate 8 1/2 by 11 inches sheet of standard copy paper.
- If using the trace on method, the images need to be sized prior to tracing on the fan blade. For this Easter fan blade I used two pieces of copy paper to make the bunny template.
- Fill in your drawing with paint.
- Let dry overnight.


Leave a Reply