DIY Christmas Door Decoration – Recycled Fan Blade!
Affiliate links may be used in this post. As an Amazon Associate I earn from qualifying purchases. Read the full disclosure policy here
Recycle an old ceiling fan into a DIY Christmas Decoration! It is easy to repurpose ceiling fan blades and update your holiday decorations into door hangers or wall hangings. Use your imagination and favorite Christmas art plus a little labor, but fun labor at that, to make a recycled Christmas craft.

It was way past time to update the rocking and rolling ceiling fans circa pre 1980 it seemed. A few of the fans could be repurposed elsewhere, but it seemed a shame to throw out old ceiling fans. The hardware was taken off and put into I may use it later craft drawer.
The fan blades made a rustic canvas to begin making a Christmas door hanger.
How To Make DIY Christmas Door Decoration With Fan Blades
Materials

Old Ceiling Fan Blade
Paint: Latex, acrylic or Gesso
Paint brush or roller
Parchment paper for tracing
Scrap ribbon or invisible thread or fishing line for hanger
Sealer (optional), but is recommended if the decoration will be in the outside elements
Directions
- Remove all the hardware on the fan blade.
- Dust the fan blade.
- Then clean with mild soap and water. Let dry.
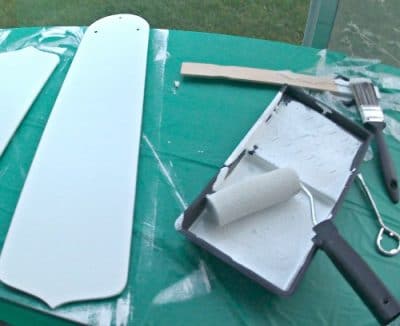
- Begin prepping the old fan blade by painting the base color on each side of the fan blade. I found this a great use for old paint that is latex, acrylic paint or Gesso.

- Gesso is used in painting to cover canvas and is thicker than paint.
- Let the paint dry overnight. The paint will dry quickly, but to ensure a solid base color I let the fan blade dry overnight.
- Watch out for the holes in the corners of the blade. Be careful NOT to fill in the holes at top of the fan blade with paint as the holes will be used later to attach the hanger.

- If paint does happen to find its’ way into the holes, simply use a paper clip end or toothpick to clean out the holes after painting.
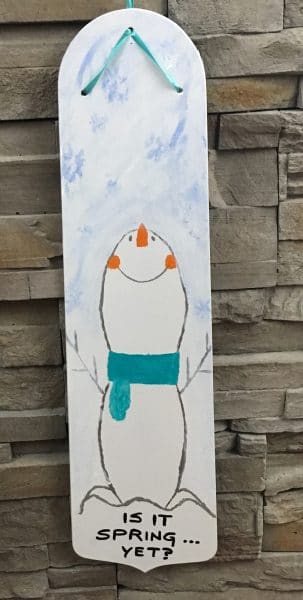
- Choose the Christmas or holiday theme of the decoration by searching the internet for inspiration. Use save an image to copy a your favorite images to free hand draw or trace later.
- If you can draw free hand, go for it. I cannot so I used the parchment paper to trace the image. Fan blades are long so parchment paper is ideal due to its’ size.

- This step is optional, but for those not comfortable with hand drawing I have found this extra step useful.
- Begin by measuring the fan blade, this blade is 21 inches by 5.25 inches for an idea of the size of the images which can be used to fit on the blade.
- I traced the fan blade on a piece of parchment paper or newspaper to make a sizing template.
- Draw the theme on the fan blade in pencil. Because of the length of the blade if using tracing paper or copy paper, two pieces will be necessary.

- If using the tracing method then the images need to be sized precisely prior to tracing the images on the fan blade.
- Let the fun begin by painting in the drawing.
- Let dry overnight.
- If hanging outside then sealer is recommended. Spray the fan blade with sealer and let dry. Don’t forget to spray both sides and let dry in an upright position.
- The hanger can be made by using scrap ribbon, string, twine or invisible thread.
- Thread the hanger through the three holes at the top of the fan blade to create a hanger.
- The length of the hanger is determined by the location of where the fan blade will hang. I suggest positioning the fan blade on the door or wall where the fan blade will hang so the length can be judged.

- Once the length is determined then tie the two ends of the string together to form a circle.
- If you like the invisible hanger, I highly recommend invisible thread or fishing line. You will be amazed how handy invisible thread is for so many craft projects now and in the future.
- The Christmas decoration is now complete and ready to hang!