Mosaic Garden Markers Anyone Can Make!
Affiliate links may be used in this post. As an Amazon Associate I earn from qualifying purchases. Read the full disclosure policy here
Add a sparkle to your garden with these homemade Mosaic Garden Markers anyone can make! A few glass tiles and popsicle sticks can be easily transformed into a cute and personalized garden marker.

How To Make Mosaic Garden Markers
Materials
Small pre cut mosaic glass tiles,
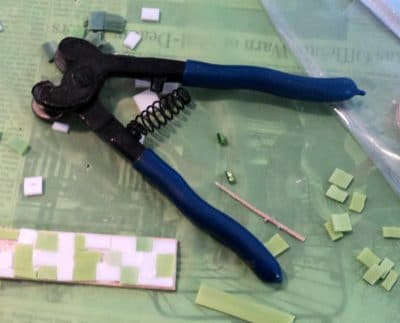
Glass Nipper (optional)
Strong craft glue, I like Well Bond
Paint sticks, wide craft sticks or popsicle sticks
Sharpie, color of your choice
Tile Sealer recommended but optional
Directions
Separate and arrange tiles on paper plates. I organize the tiles by colors.
Lay newspaper or a plastic tablecloth on the working surface.
Lay out the paint or craft sticks.
The entire stick will not be tiled as the bottom of the stick will be in the ground.
Tiling three quarters of the paint stick or popsicle stick is a solid base for the garden marker. This leaves the bottom one quarter of the stick empty.
With a sharpie mark the end of the tiling area by drawing a horizontal line across the stick.
Design the mosaic garden marker.
The design can be freestyle (made up as the tile is applied with the glue) or lay out the tiles on the stick first.
Arrange or rearrange the tiles until a a design is chosen.
Apply an even layer of glue to a small section of the stick, 1″ by 2″ is a nice sized section to work with.
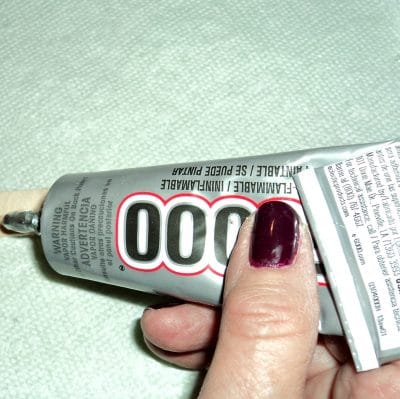
The consistency of mustard is a good starting point as to how thick the glue should be applied. Don’t skimp on the glue, but you don’t want an explosion of glue upward when the tiles are applied.
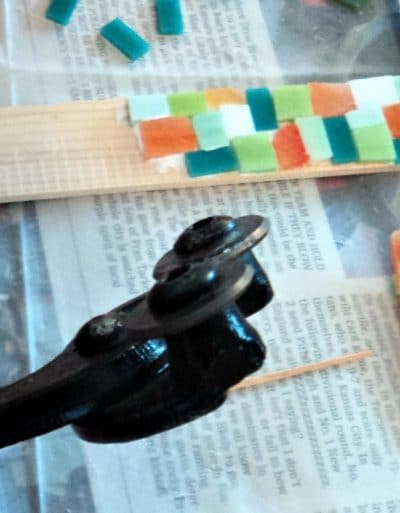
Continue applying glass tiles along the stick. The edges of the tiles should be adjacent to each other.
When finished tiling, take a Sharpie and write the name of the herb or vegetable on the garden marker.
I made a few different designs and placed the writing on different sections of the stick.
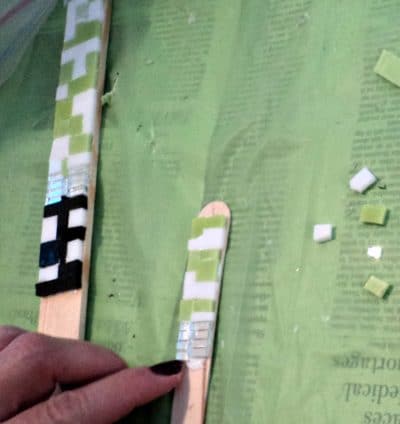
Writing on bottom

Whether the writing is vertical or horizontal depends upon the design of the marker. I placed the herb name on the top, toward the top, toward the bottom and framed with tiles. This is a very versatile and flexible DIY garden marker.

Do I Need To Grout The Garden Marker?
No, grouting is not necessary. The garden markers do not have to be grouted! I have made the garden markers both ways with and without grout.
Both ways stood up well to the sun, rain and weather. I do advise the markers be brought inside for the winter if you live in an area with snow.
If you regularly work with glass tiles and are used to grouting and sealing the finished work – go for it – but it is optional for this easy DIY.
If planning to grout the garden marker then the edges of the glass tiles should have a space between each tile to create a seam for the grout.
How To Grout The Mosaic Garden Marker
Let the garden markers dry for 24 hours.
Grout the sticks. A nice tutorial is available here.
Grout is really easy to apply, is forgiving and a bit like playing with mud! If you are not ready to mix grout then a quick and easy Mosaic Hack is available.
Pre mixed grout from the big box stores is so so easy to use. No need for messy grout mixing when the grout is mixed for you in a tub. Simply put on a pair of plastic gloves and dive in.
One of the advantages of pre mixed grout besides being a time saver is the consistency of the grout. No problems finding the right water and cement mix for mosaic grouting. Any color (but white!) can be used that is compatible with the tile colors. Delorean Grey is always a good choice as a neutral color for grouting.
After the sticks are grouted , wait another 24 hours for the sticks and grout to set.
Spray the sticks with tile sealer.
Let the sticks with the sealer dry for 24 hours.
Polish with a white cotton cloth.
Add the garden marker to your garden!
Where To Buy Pre Cut Glass Tiles
Online purchasing of glass tiles is very easy if you are an Amazon prime member. There is now a very nice selection of glass tiles are available on Amazon and the shipping is quick!
The multi colored packs of glass tiles work really well for garden markers. Color coordinated tiles and pre cut tiles of all colors are also available.
A favorite source for pre cut tiles is Mosaics By Maria. The pre cut tiles come in a large selection of colors and sizes. The skinnies are very thin rectangles perfect for tiling mosaic garden sticks. Glass nipping will be at a minimum if the tiles purchased are small in size.
What Kind Of Glass Nipper Is Needed?
There are many shapes and brands of glass nippers at different price points. My favorite is actually a nice light weight nipper I originally found at a big box store. No muss and no fuss, this has been a great affordable glass nipper for mosaic projects.
I actually highly prefer this nipper over more expensive nippers I have purchased and tried.

![]()
But it really is personal preference and a little trial and error can be necessary to find a glass nipper with the strength, weight and ease of use which fits your hand.
More Mosaic Projects
Turn Your Dog Into A Mosaic Tile