DIY Modge Podge Christmas Ornament For Kids
Affiliate links may be used in this post. As an Amazon Associate I earn from qualifying purchases. Read the full disclosure policy here
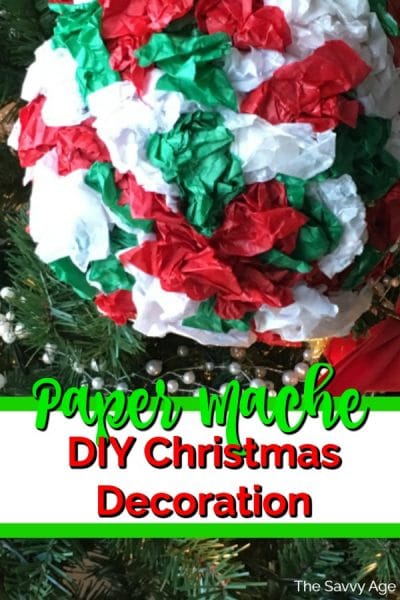
Easy Modge Podge Christmas Ornament, the fun Christmas craft for kids! And this adult had a great time making these easy ornaments too! This DIY Christmas decoration doubles as a Dollar Store Christmas craft and can be made in under an hour.
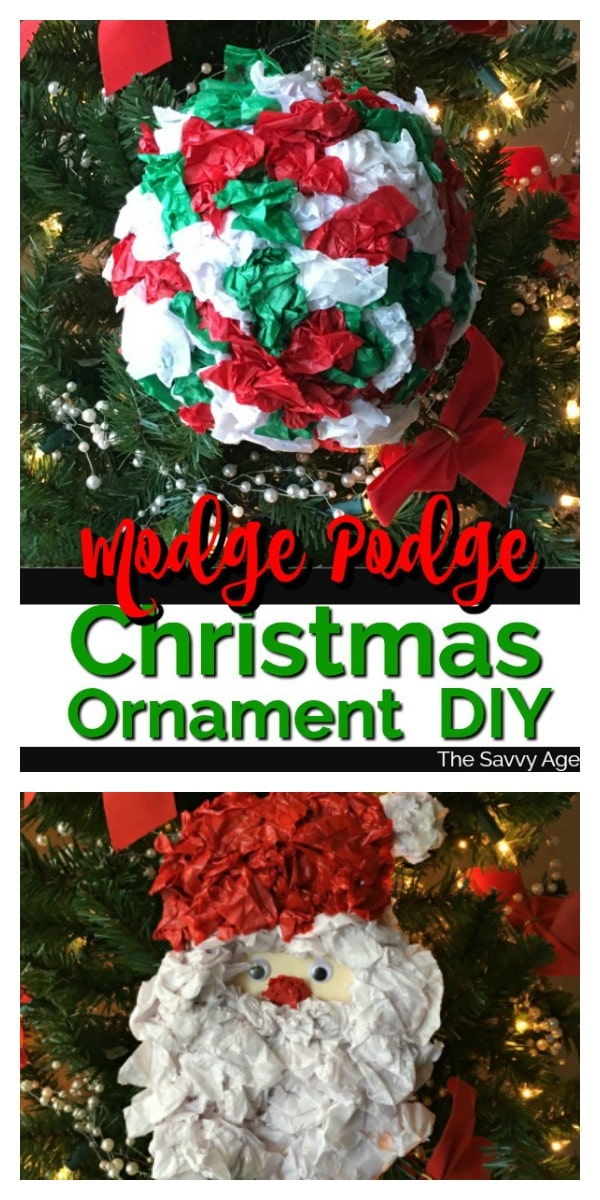
Just a few materials and alot of ooey, gooey modge podge holiday fun went into making a Santa paper mache ornament and a red, white and green Christmas decoration which can be an ornament or part of your Christmas decor.
Now, let’s start gluing! Kids of all ages can participate and this is a perfect Christmas craft for toddlers. Who doesn’t love just tearing apart colorful tissue paper and turning paper into a colorful Christmas ornament!
How To Make A Modge Podge Christmas Ornament
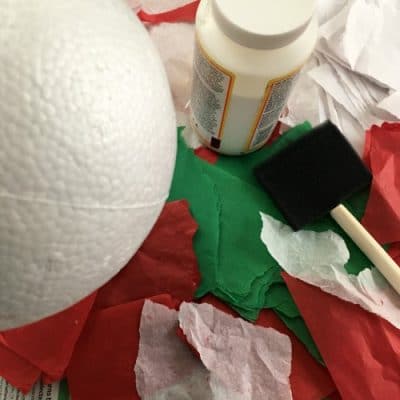
Materials
Tissue paper (colors of your choice)
Wood Santa ornament (from the dollar store!)
Ribbon or invisible thread for hanger
How To Make Modge Podge Ornament Ball
Anything goes when crafting this ornament or Christmas decoration! Choose the tissue paper color of your choice and this is the Christmas craft young kids can easily make!
- Tear the tissue paper into small to medium size pieces, about 2 ” by 2″ is a good guideline.
- Gently crumple each piece of tissue with your fingers.
- The ball will be filled in sections.
- Pour modge podge onto a paper plate.
- Use disposable gloves if desired to keep hands free of modge podge. These are my favorite disposable gloves I use for crafting and cooking. The gloves are a bit more expensive than the clear gloves, but I prefer latex free gloves and gloves that are sized.
- Apply a layer of modge podge on a quarter (of the ball) size section of the foam ball.
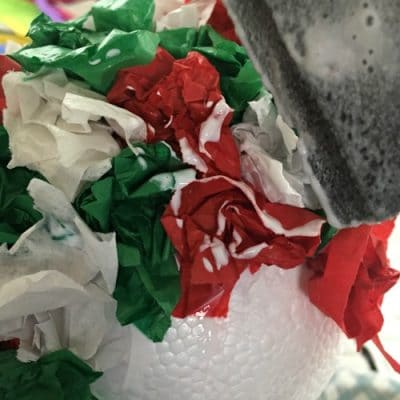
- Dip, yes dip! the tissue puff into the modge podge and apply to the ball.

- Repeat for each tissue puff!
- After a quarter of the ball is filled, now paint over the section with modge podge!
- Using a foam brush, dip the brush into the modge podge.
- Gently apply all over the tissue paper.
- The tissue paper can remain fluffy if desired by dabbing the modge podge on with the foam brush.
- Be generous with the modge podge and cover all the tissue paper.
- If you want a “fluffy” Christmas ornament, the tissue puffs can be molded ‘up’ with the brush.
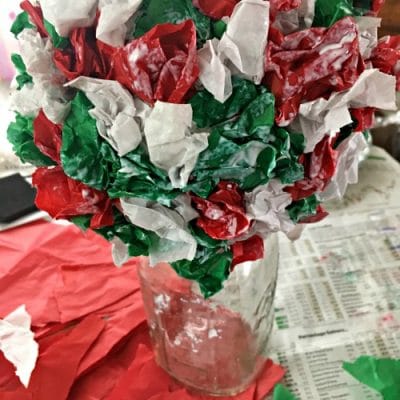
- Repeat for the remaining three sections of the ball.
- Let the ball dry. I suggest overnight. I used a mason jar as the base for the ornament to dry.
- If making an ornament, use ribbon or invisible thread to attach the ornament hanger to the top of the ball. Having invisible thread in my craft supplies is a purchase that has come in handy so many times with so many crafts!


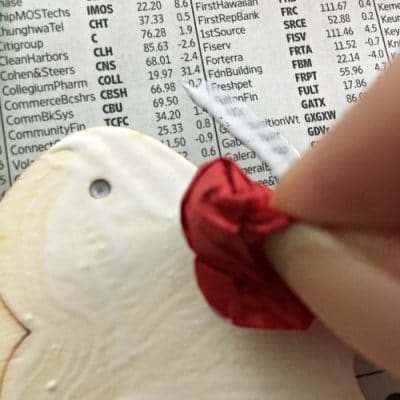
How To Make Modge Podge Santa
I found a large wood Santa ornament at the dollar store and decided to try the above modge podge technique on the wood ornament. This is like a paint by numbers craft but with modge podge!
The Santa was made in under an hour and the Santa was kept simple with using red and white tissue paper plus two googly eyes.
- Tear white and red tissue paper into 2″ by 2″ or 1″ by 1″ squares. The size is approximate. The bigger the piece of paper the fluffier the ornament.
- I glue the eyes on first as that gives a good visual reference when filling in the remainder of Santa. But the eyes can easily be moved later if needed.
- Pour modge podge onto a plate.
- Dip each piece of tissue in to the modge podge.
- Place the tissue paper on the Santa. The design of the Santa is up to the crafter.
- After the entire Santa is filled in with tissue paper use a foam brush to modge podge the entire Santa.
- Be generous with the modge podge.
- Fluff up the Santa if desired with the brush when applying the modge podge.
- Let dry overnight.
- Attache an Ornament hanger with invisible thread or ribbon.
- Many wood ornaments have a pre cut hole for the hanger. If the hole is not pre cut or has been covered with tissue paper, attach to the back of the Santa.

More Modge Podge Christmas Decorations
This Christmas was a ton of fun using modge podge to make Christmas decorations. I love the freedom of using modge podge with tissue paper as there are no rules.
Modge Podge is very suitable for young kids to use and begin Christmas crafting.
After making the Modge Podge Christmas ornament the mason jars and reindeer were calling! I had a few leftover mason jars from the Fall crafting season and decided to light up the Christmas mantle with illuminated Modge Podge Mason Jars.
Being a fan of all Reindeer crafts and making use of all crafting materials the same basic materials for the ornaments were used to make the Reindeer Modge Podge Mason Jars.
And of course you know how one thing leads to another! The Reindeer and Santa Modge Podge Mason Jars led to modge podging photos on the mason jars for a personalized touch. Another easy Christmas craft!